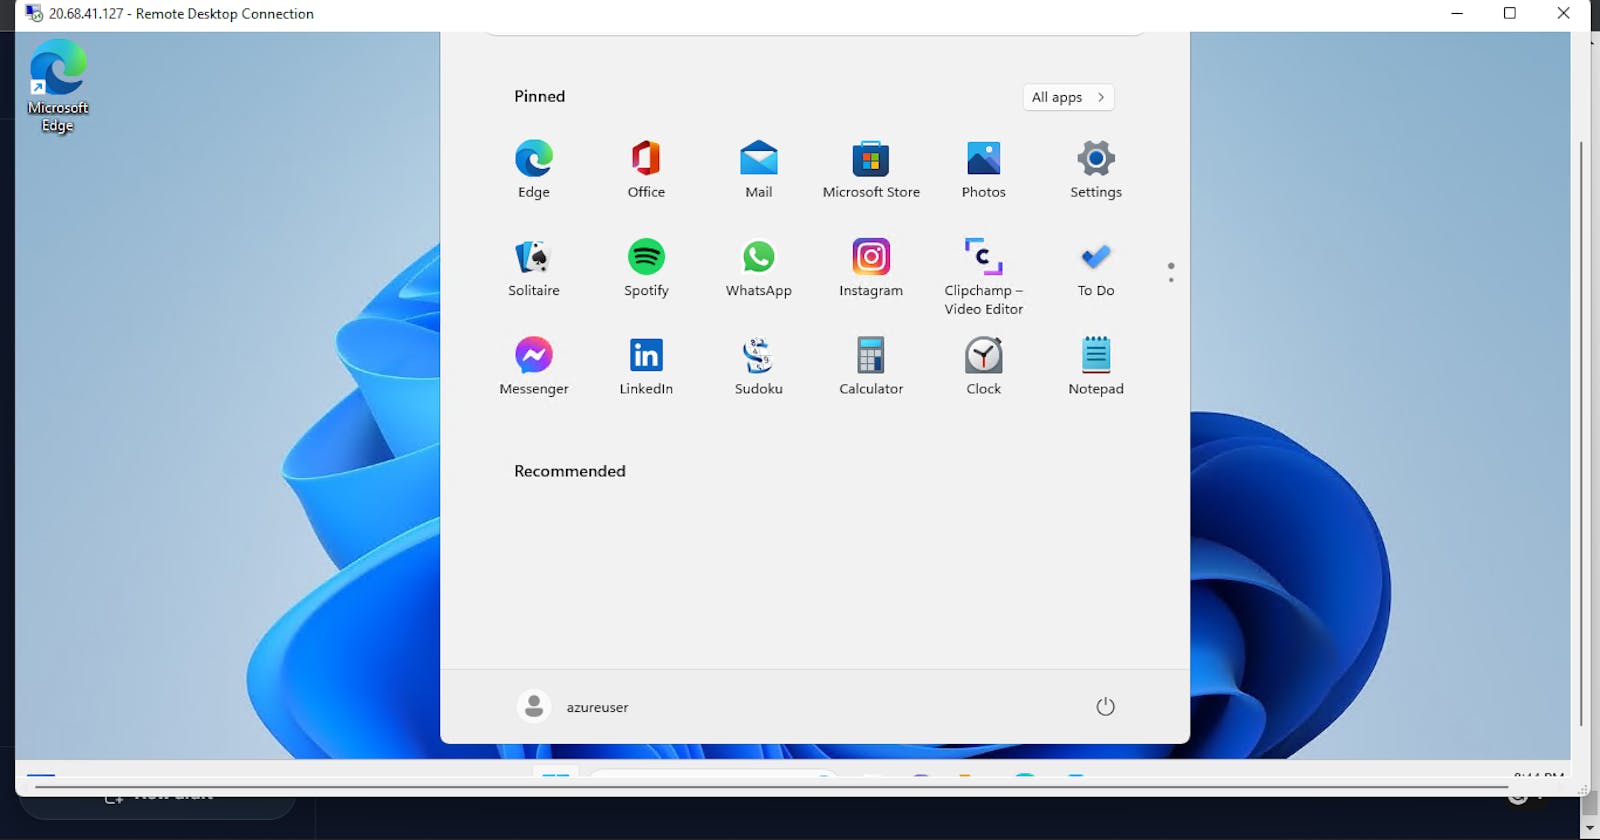
Create a Windows virtual machine in Microsoft Azure using this step-by-step tutorial.
A virtual machine (VM) is a piece of software that embeds a virtual machine inside a real one. The virtual machine may function independently of the host computer and have its own operating system, programs, and files.
To help you comprehend what a virtual computer is, here is an analogy: Think of a physical computer that has two hard disks. Each operating system will believe that it is the only operating system on the machine if you install two separate operating systems on the two hard drives. This functions in a manner akin to a virtual machine.
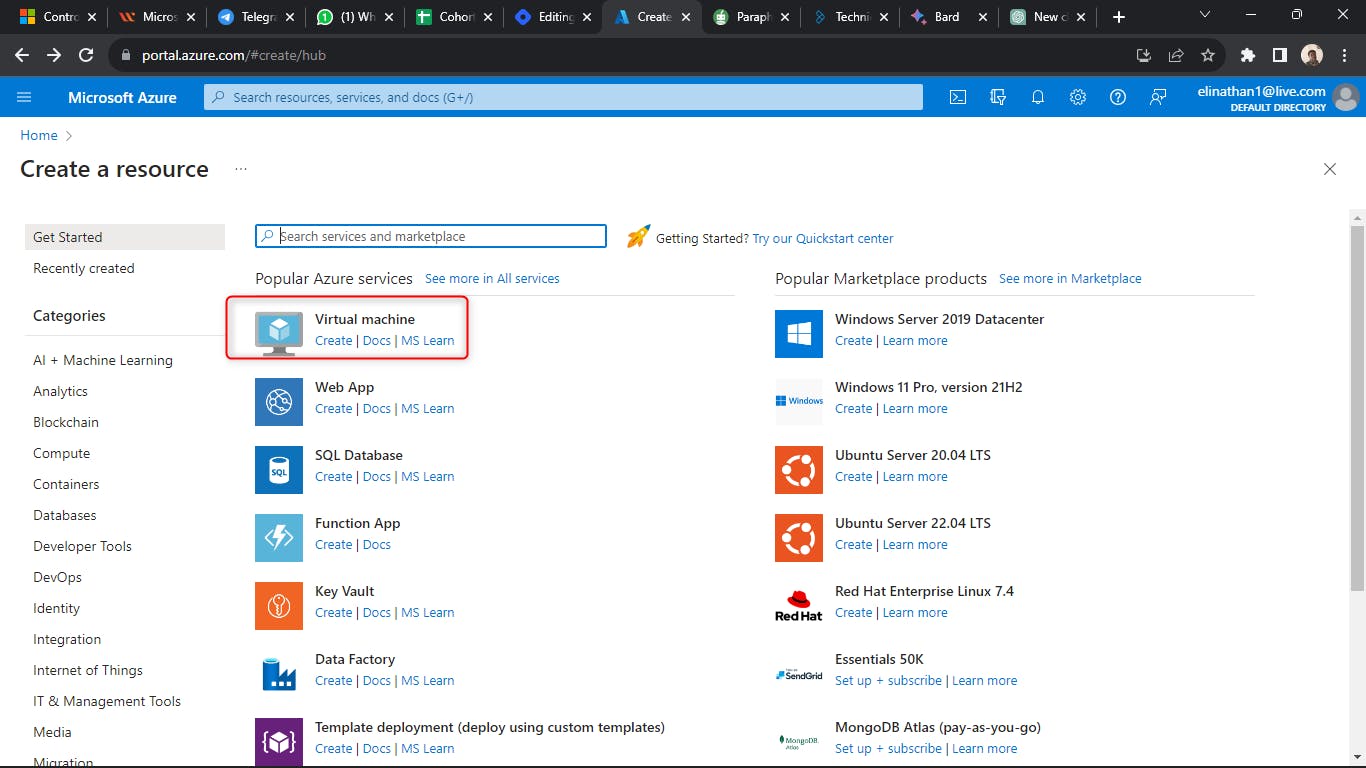
The first step is to log in to the Azure portal. then make sure you have a running subscription on your Azure account, then on the main page click on Create as shown in the diagram below

then click on Virtual Machine as shown in the diagram below
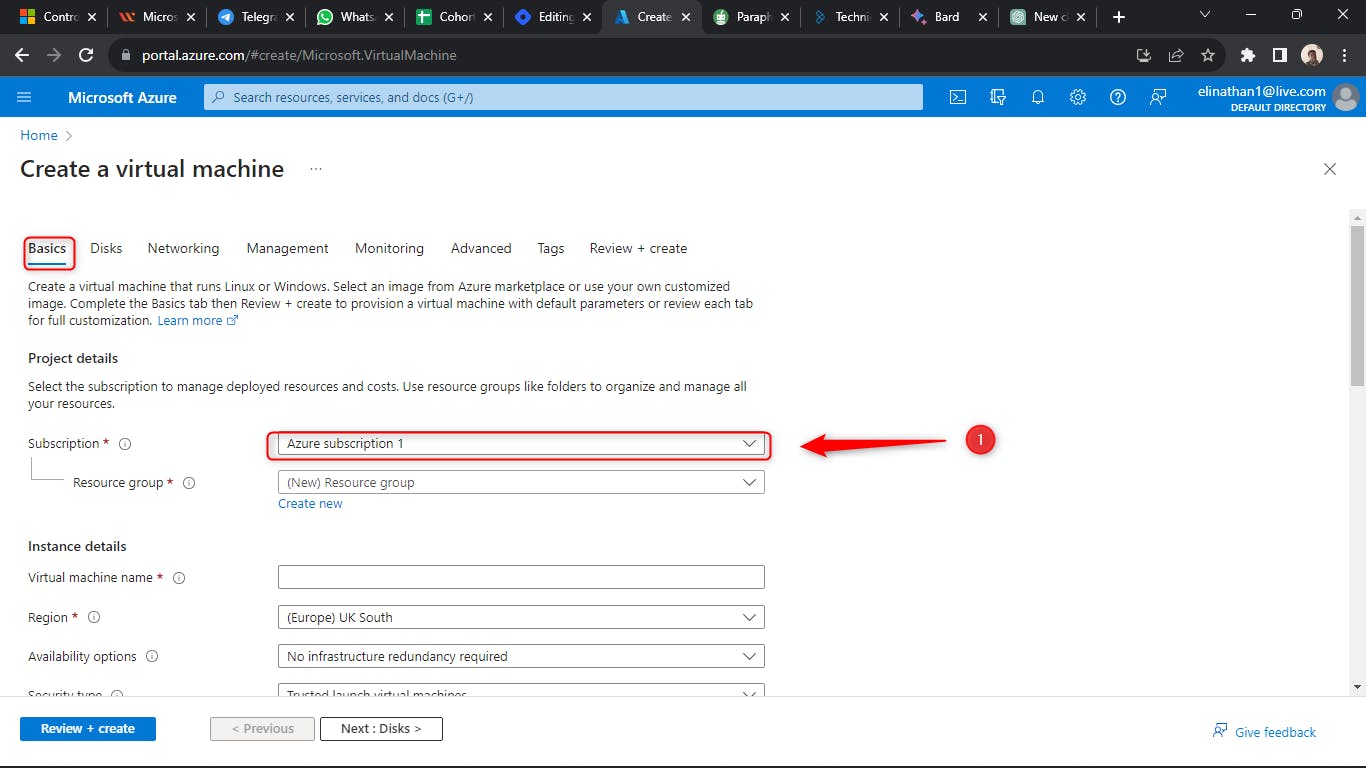
In the diagram below, I clicked on Create a virtual machine, and on the Basics tab, you can see my existing subscription, which is required to create a virtual machine.
Here, the next step is to create a resource group, which I did as shown in the diagram below and named Augustworkload-reggierg.
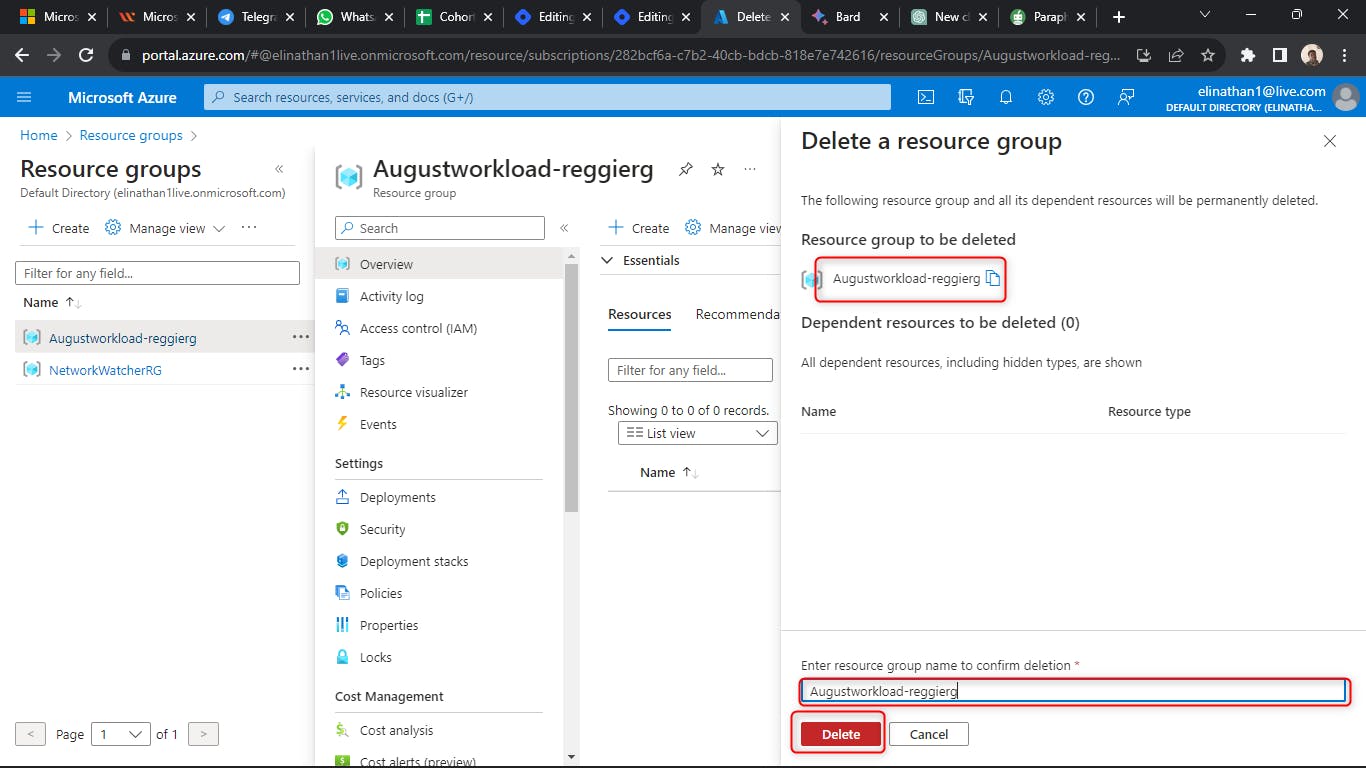
A resource group is a logical container that holds related Azure resources; in this case, it is holding the virtual machine and its hard disk, etc., equivalent to a laptop bag where you put the charger laptop and all its contents, making it easy for you to delete it when you are done to avoid incurring bills from Azure, especially in our case where we are just using it for testing purposes.
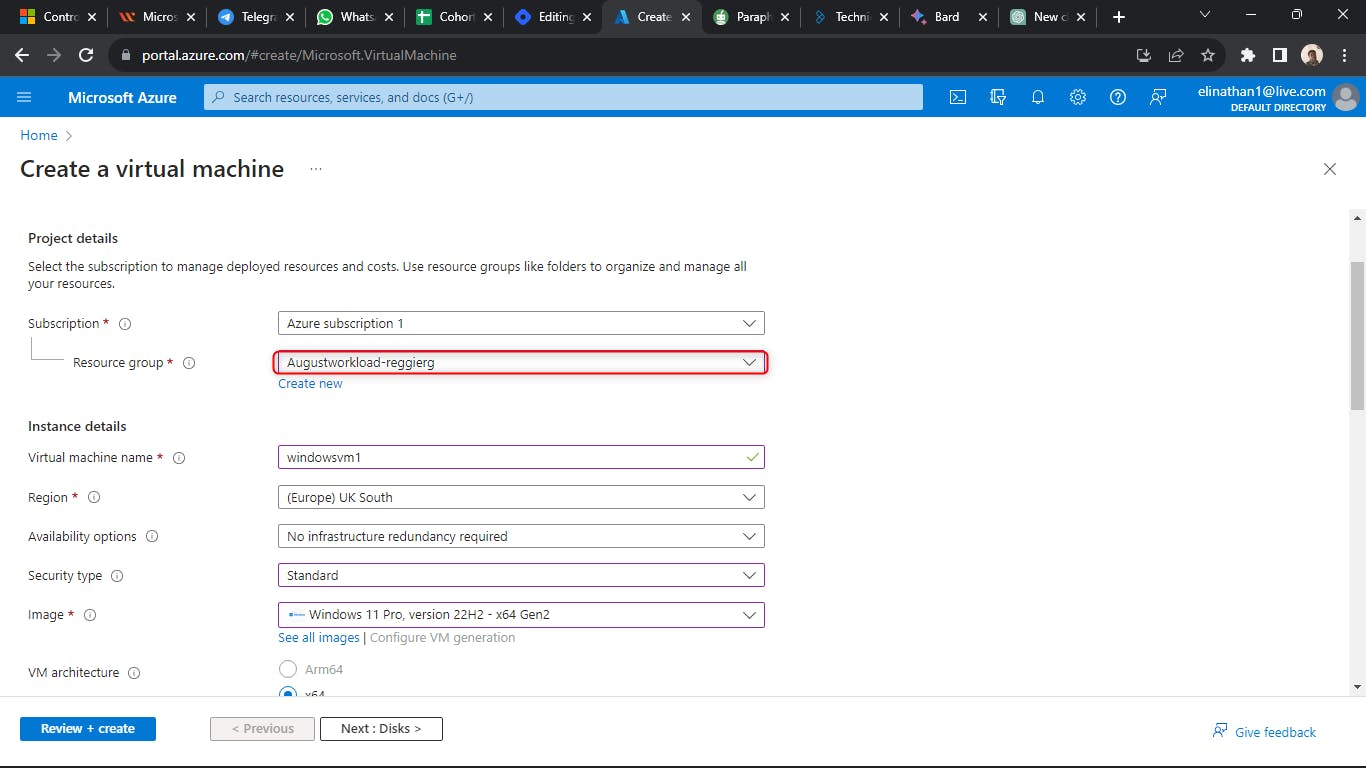
The next step is to give the virtual machine a name, just as you would your physical computer.
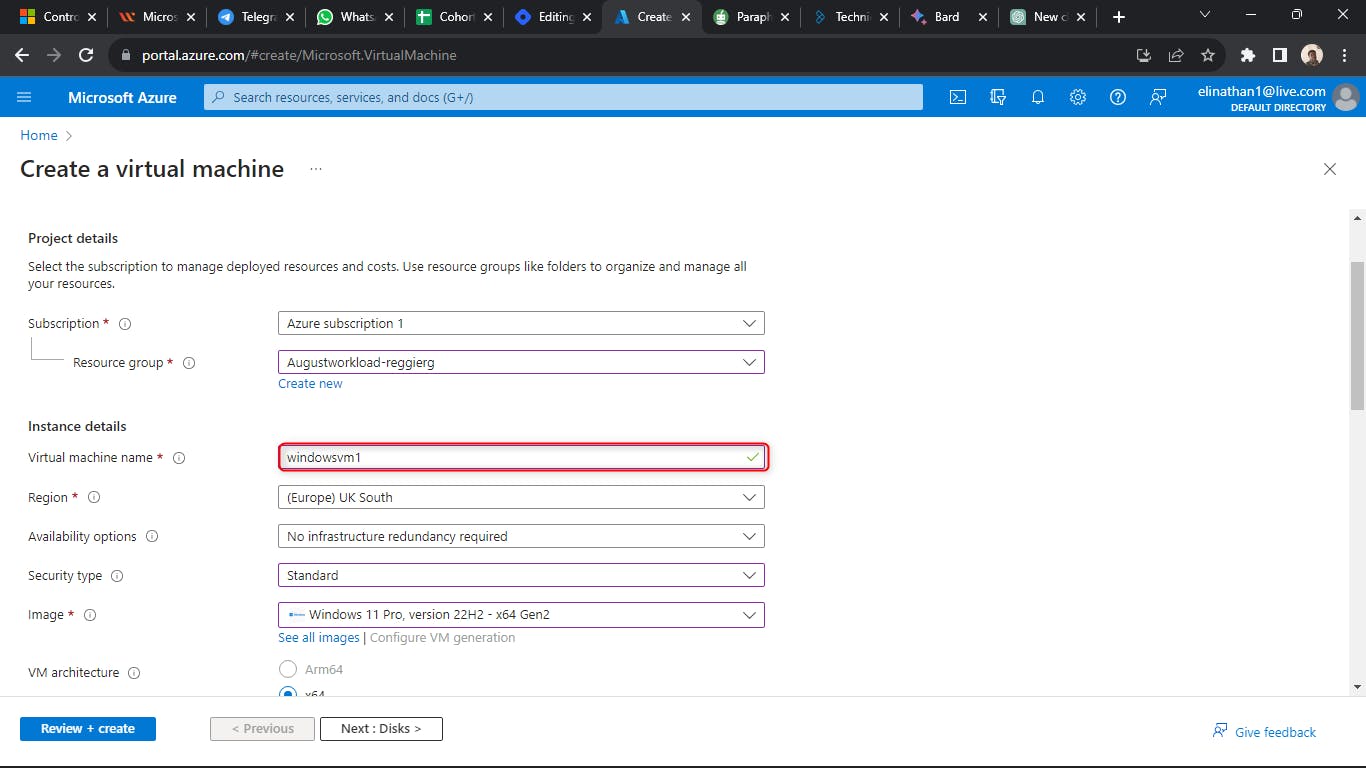
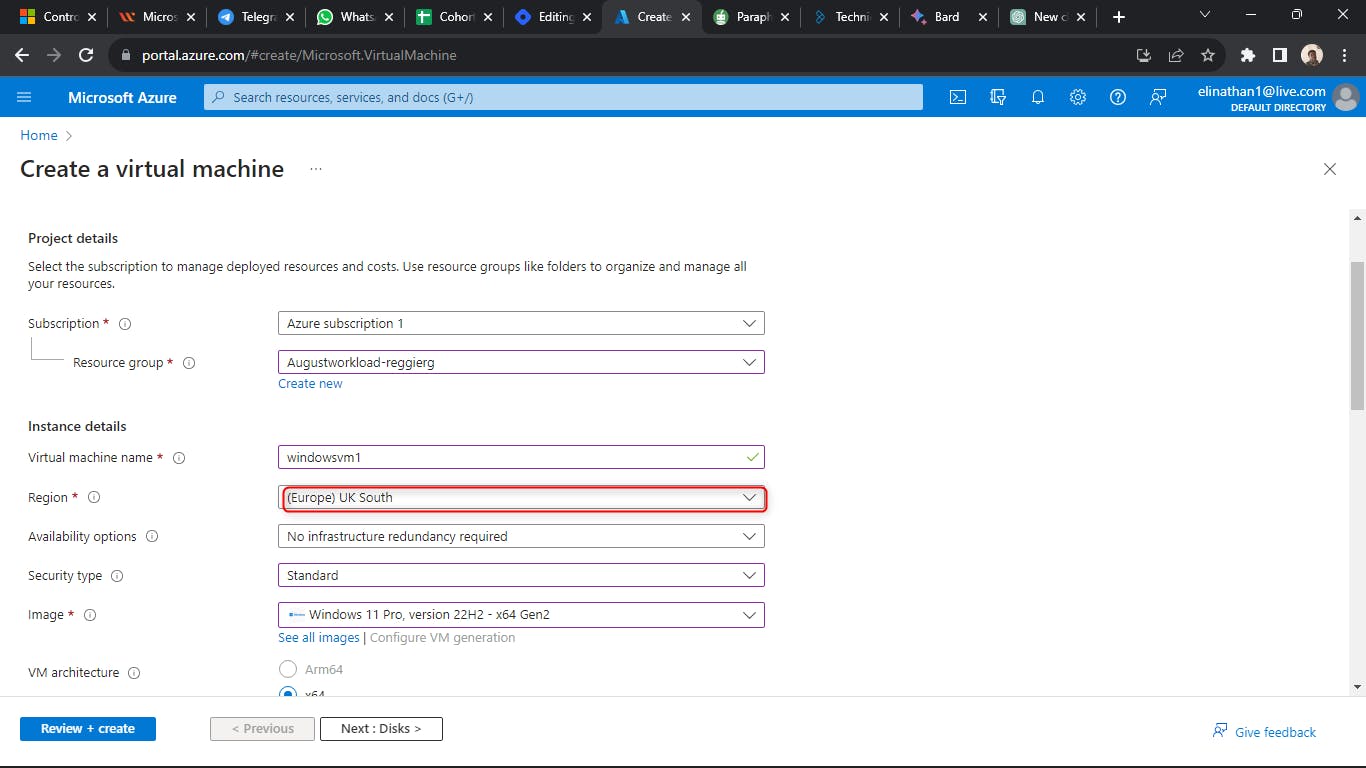
The next step is to assign it to a region. And An Azure region is a physical location where Azure resources are deployed. Each region is made up of one or more data centers that are connected by a high-speed network. Azure regions are located all over the world, so you can choose the region that is closest to your users or that meets your compliance requirements.
The closest region to me is the UK South since I am based in Nigeria, as shown in the diagram below.
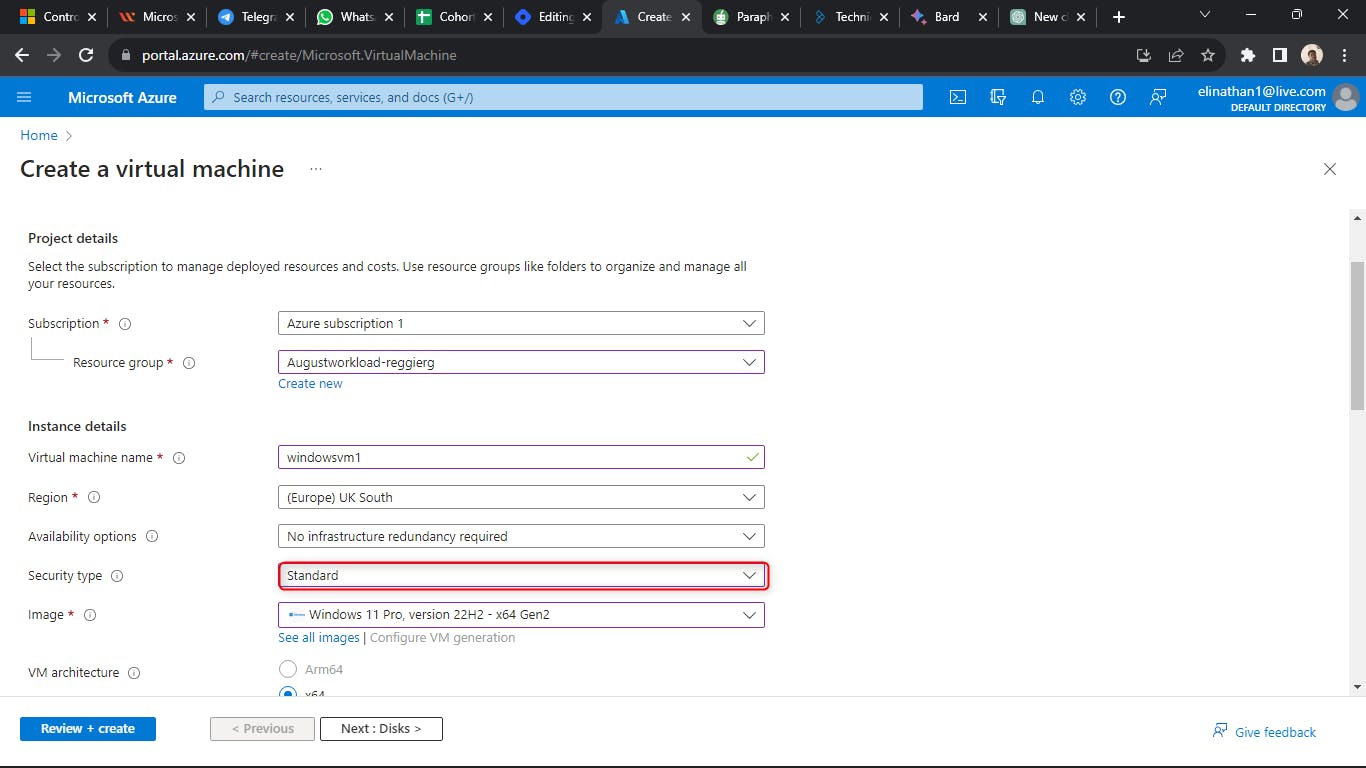
The next step is to choose the security type you need for your virtual machine
Security refers to the different ways that you can secure your virtual machine. In the diagram, i chose standard because I am just using it for testing purposes
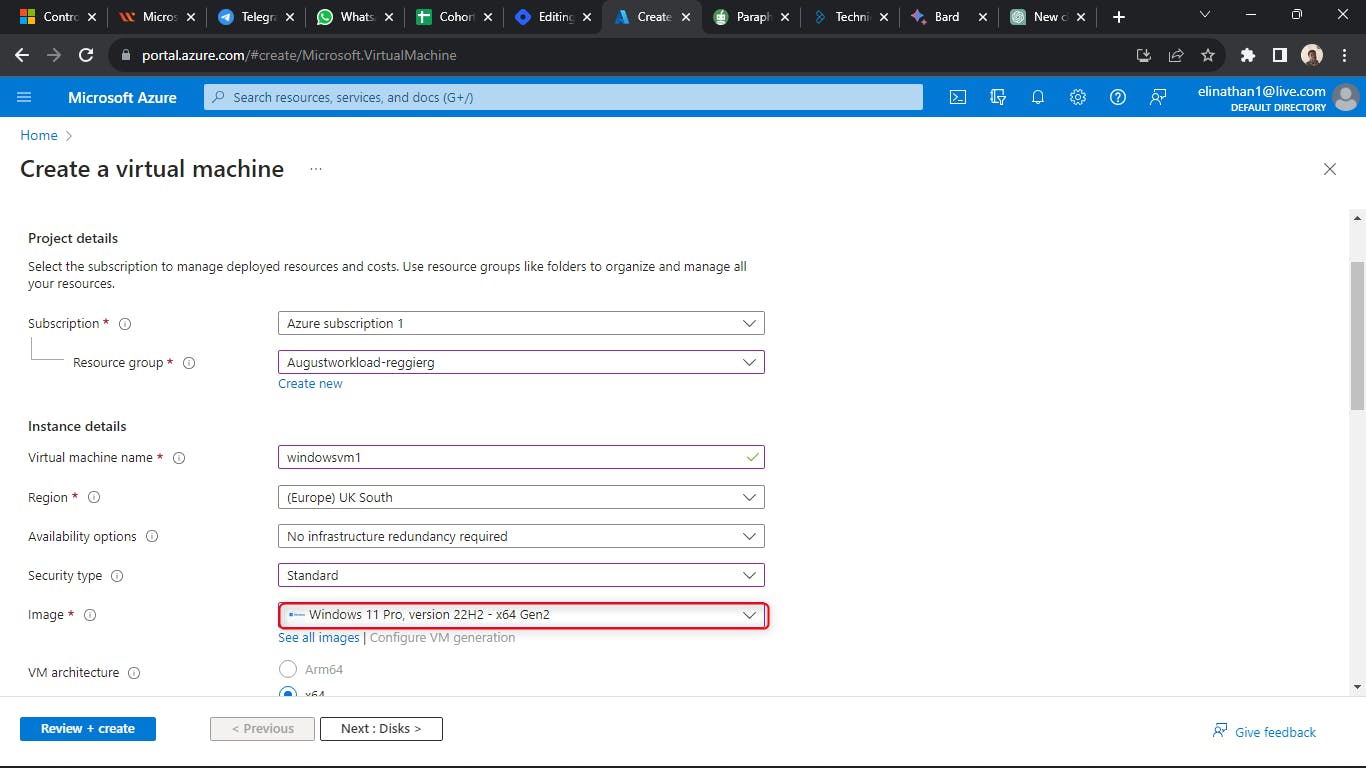
Then the next step is to choose the image to install Also take note that this image is referring to the operating system I will be installing; as shown in the diagram below, I installed Windows 11 Pro.
The next step is about the VM architecture, which is a way of organizing and managing Azure virtual machines (VMs). It is a logical way to think about how your VMs are connected to each other and to other Azure resources. In the diagram below, we are choosing the only option available, x64.

The next step is to select the size, which refers to the workload you want to run here I selected the smallest since I am just using the VM for testing purposes.

The next step is to choose the administrator username, as shown in the diagram below.

The next step is to choose the administrator password and confirm it, as shown in the diagram below.
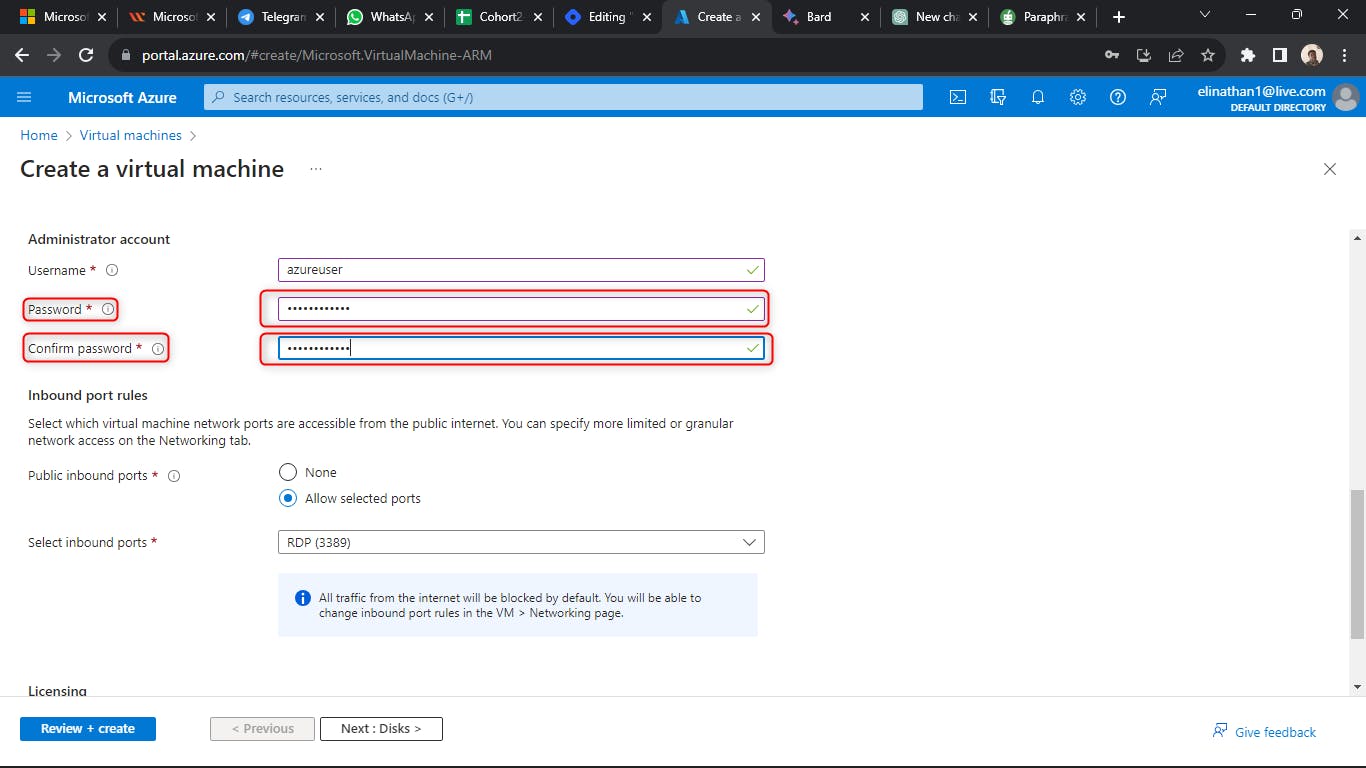
The next step is to choose the ports you will allow access from the internet to the VM. For a Windows VM, you must at least allow port 3389 so that you can allow RDP remote Desktop Protocol into it. For testing purposes, you can allow any IP address from the internet, but in production, you have to allow certain IP addresses.
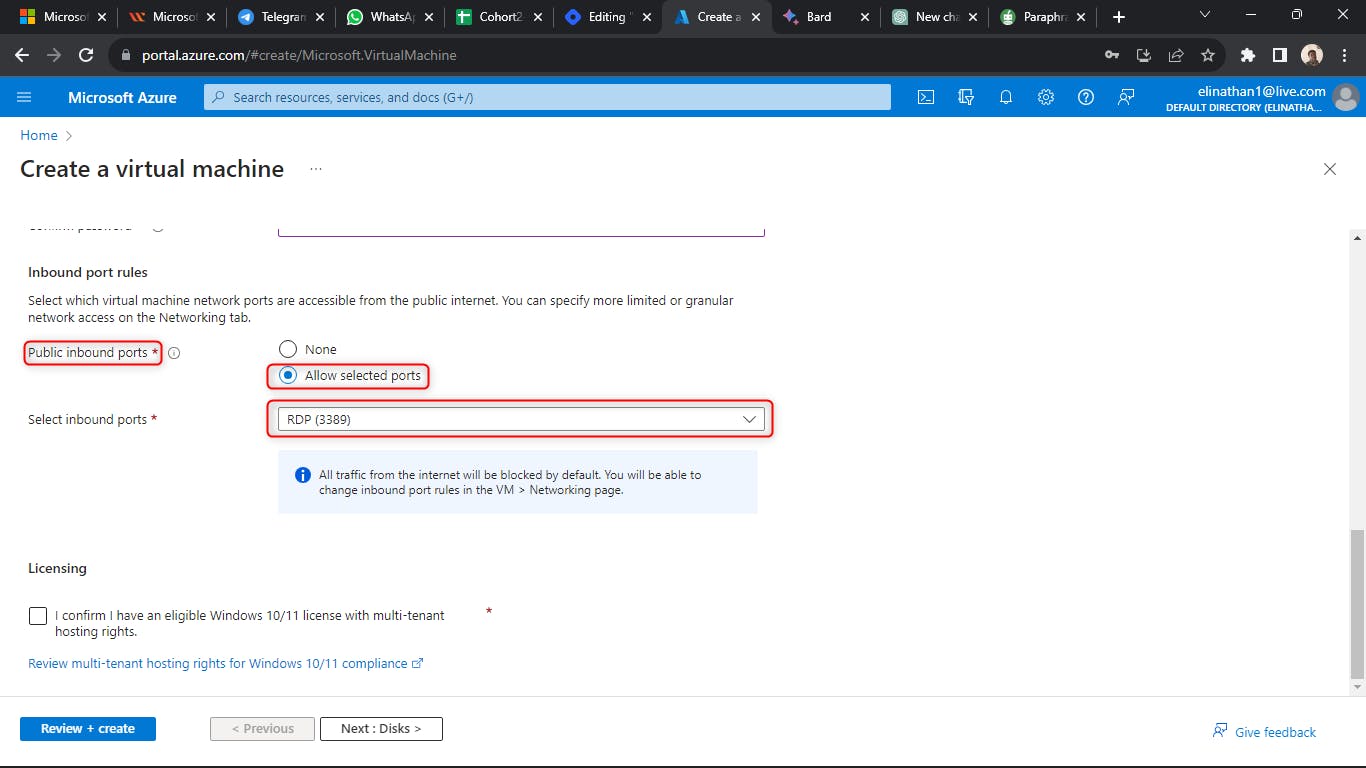
The next step is to accept the licensing agreement.

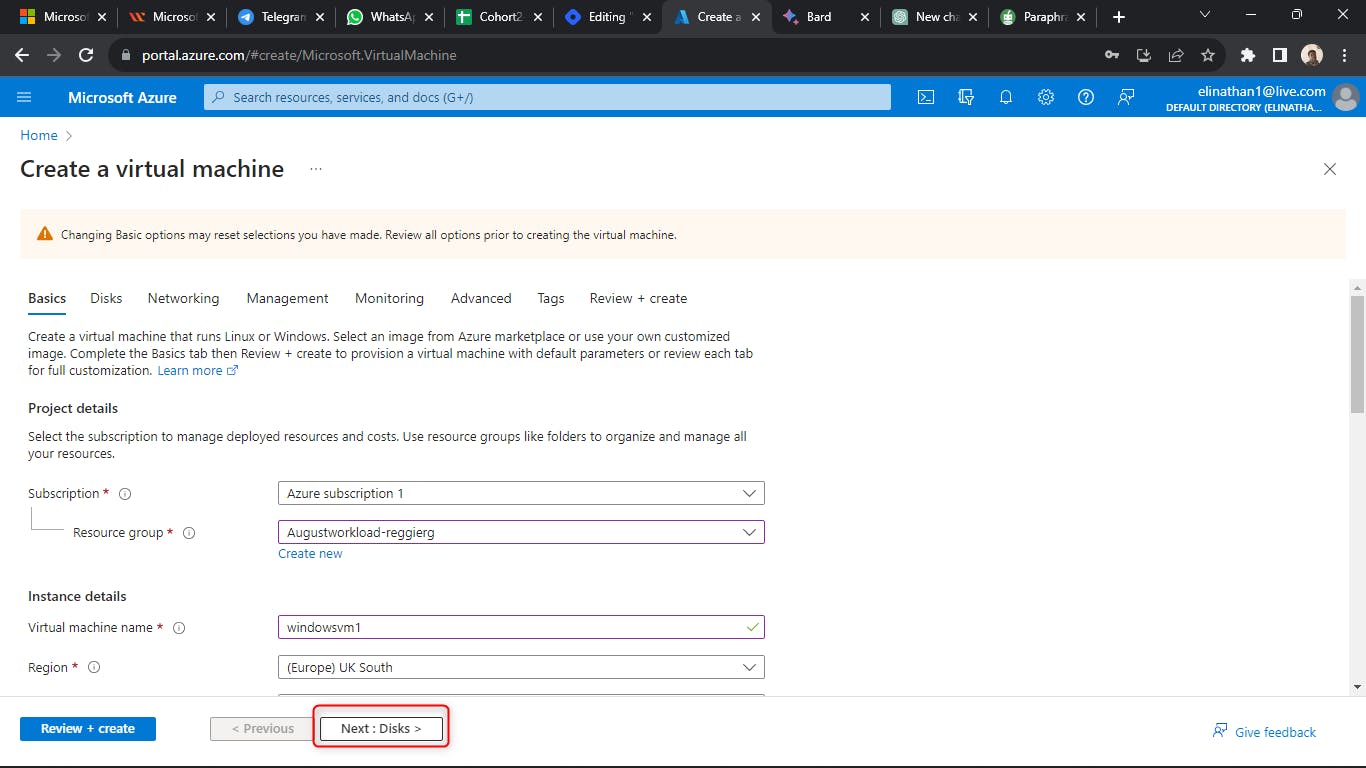
Then you click on Next to go to the Disks tab, as shown in the diagram below
The next step is to select the Disk type. I chose a standard SSD for testing purposes.
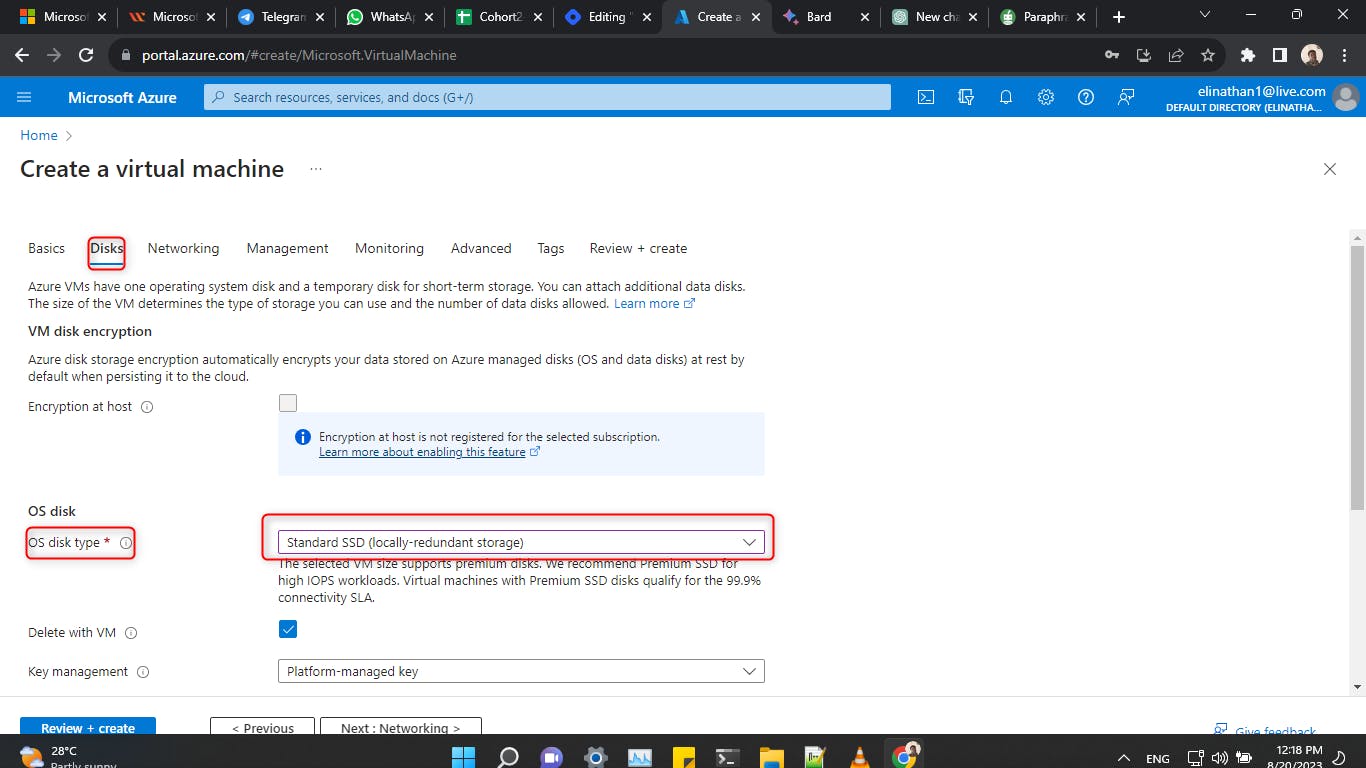
This step is optional, as shown in the diagram, but I think it will save money if you delete the Disk as you delete the VM, but it depends on the business needs.

The act of storing and managing the encryption keys that are used to secure the data on your Azure virtual machines (VMs) is known as "Azure VM key management." These keys are used to encrypt the information on the disks and in the memory of your virtual machine.
In the diagram below, I selected Platform-managed keys: These keys are managed by Microsoft and are used by default. They are considered secure enough for most workloads.

The next step is to click Next to go to the Networking tab, as shown in the diagram below.

In this step, in the Networking tab, Azure creates a default route table it calls a virtual network and names it after the windowsvm1 virtual network. It also has a DHCP server in-built so that any VM that is on the same virtual network gets an IP address automatically assigned to it.

This step is where you select the subnet or leave it as default. A subnet is used to isolate VMs in the network and allow any other VMs in the same network to communicate with each other locally, equivalent to a LAN. Analogous to staying in the same street or neighborhood.

This next step is for your VM to have access to the internet so that you will be able to reach it, which is the essence of a public IP.

This next step is about Network security, where the network security group allows or denies inbound and outbound traffic.
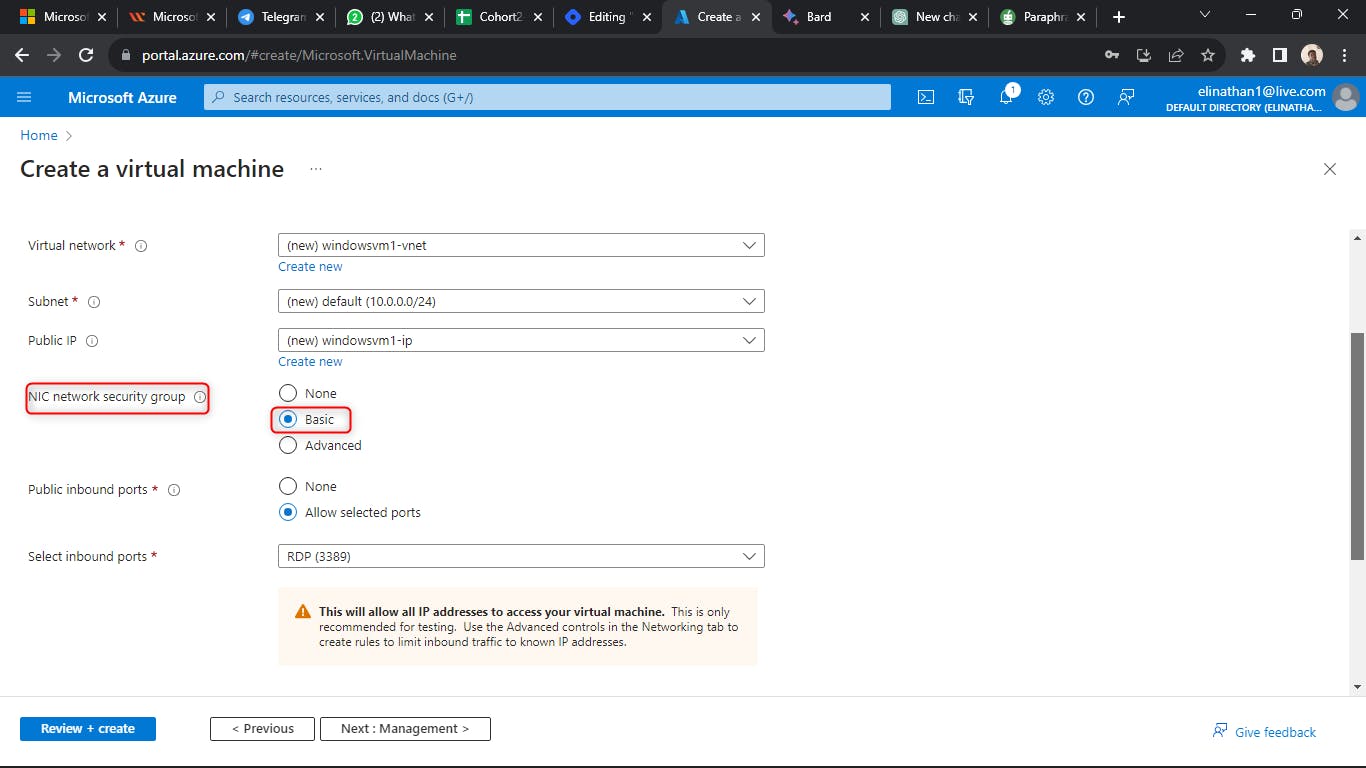
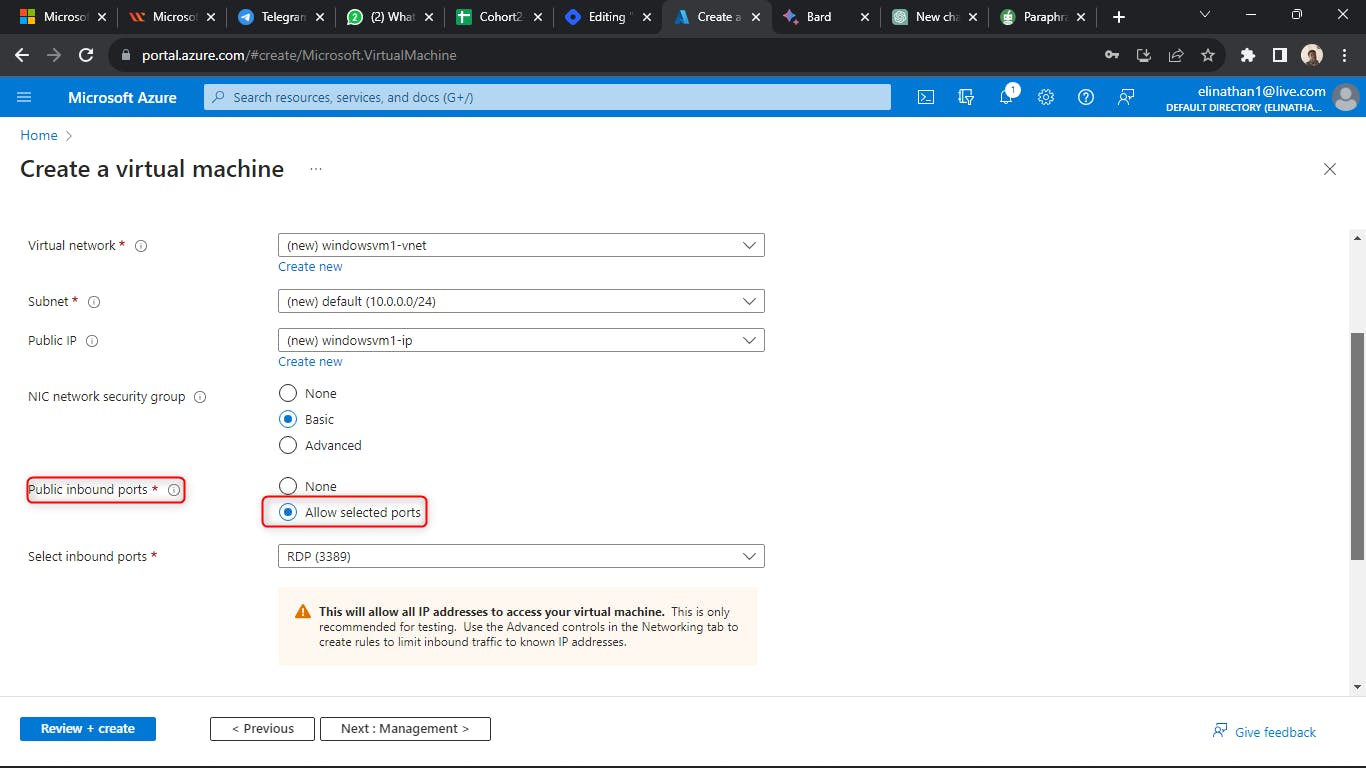
Then you go to the next tab, which is the Management tab, but since I am using it for testing purposes, I will just skip it to the Monitoring Tab. In monitoring, it is best practice to disable the diagnostics to avoid sharing too much sensitive information with Azure.

Then you go to the next tab, which is the Advanced tab, but since I am using it for testing purposes, I will just skip it to the Tags Tab. In Tags, it is best practice to give them a name and value, as shown in the diagram below.
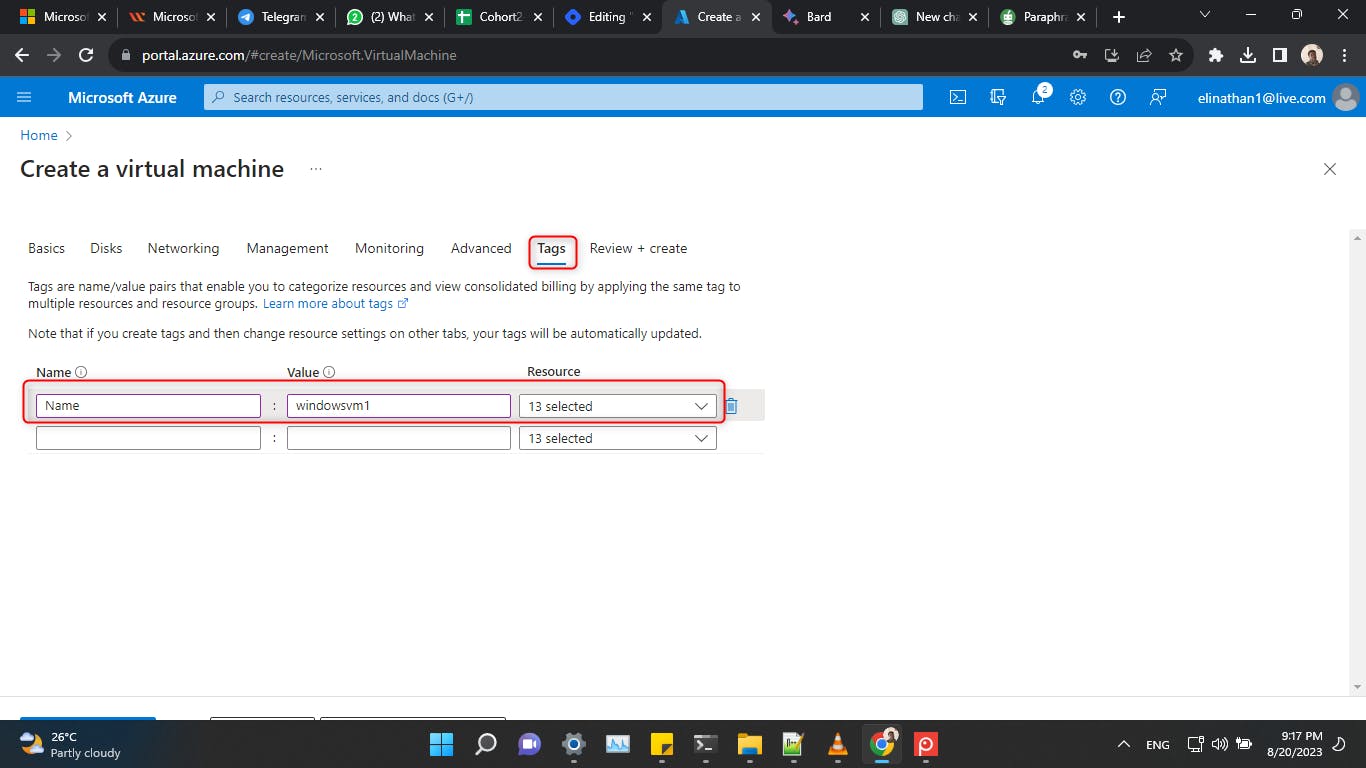
Then you click on the next tab, which is Review+Create for Azure, to run the final validation, and when you have passed as shown in the diagram below, you can go ahead and create your VM.
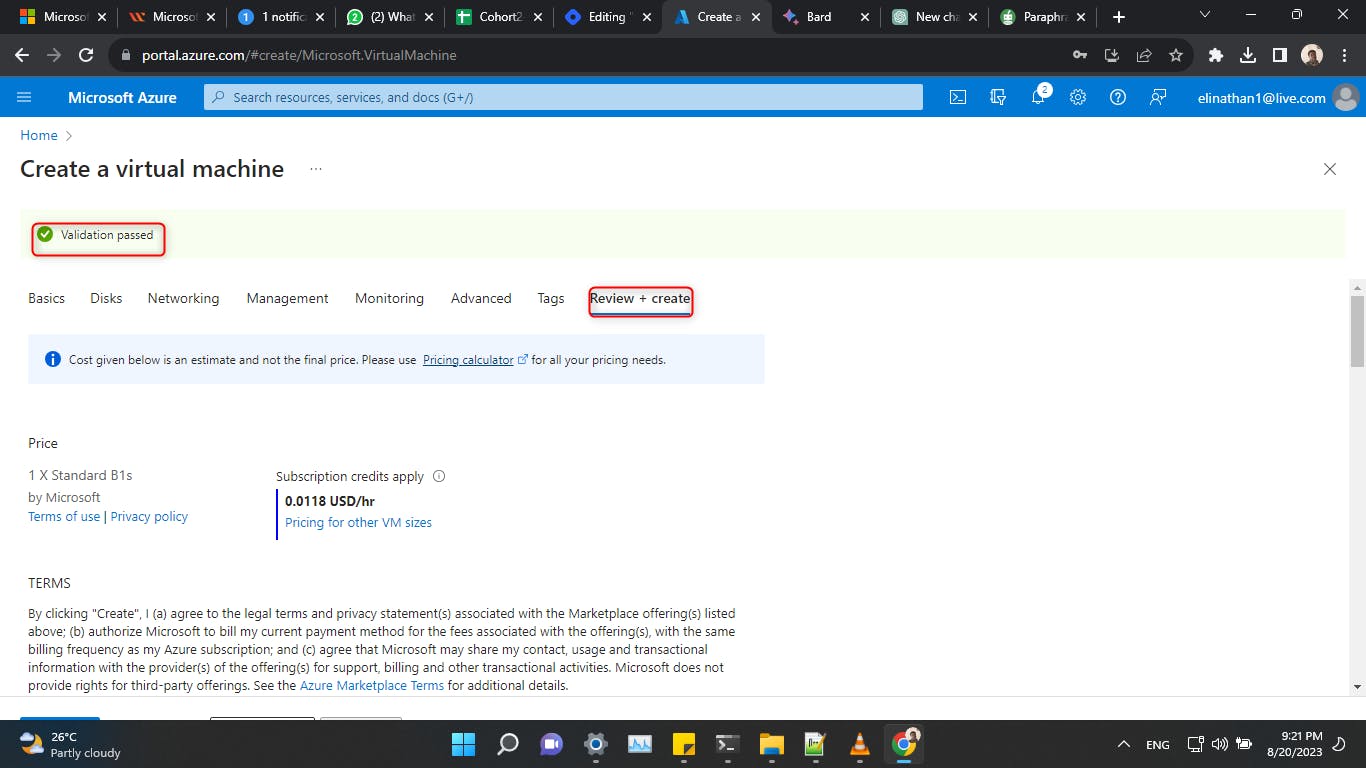
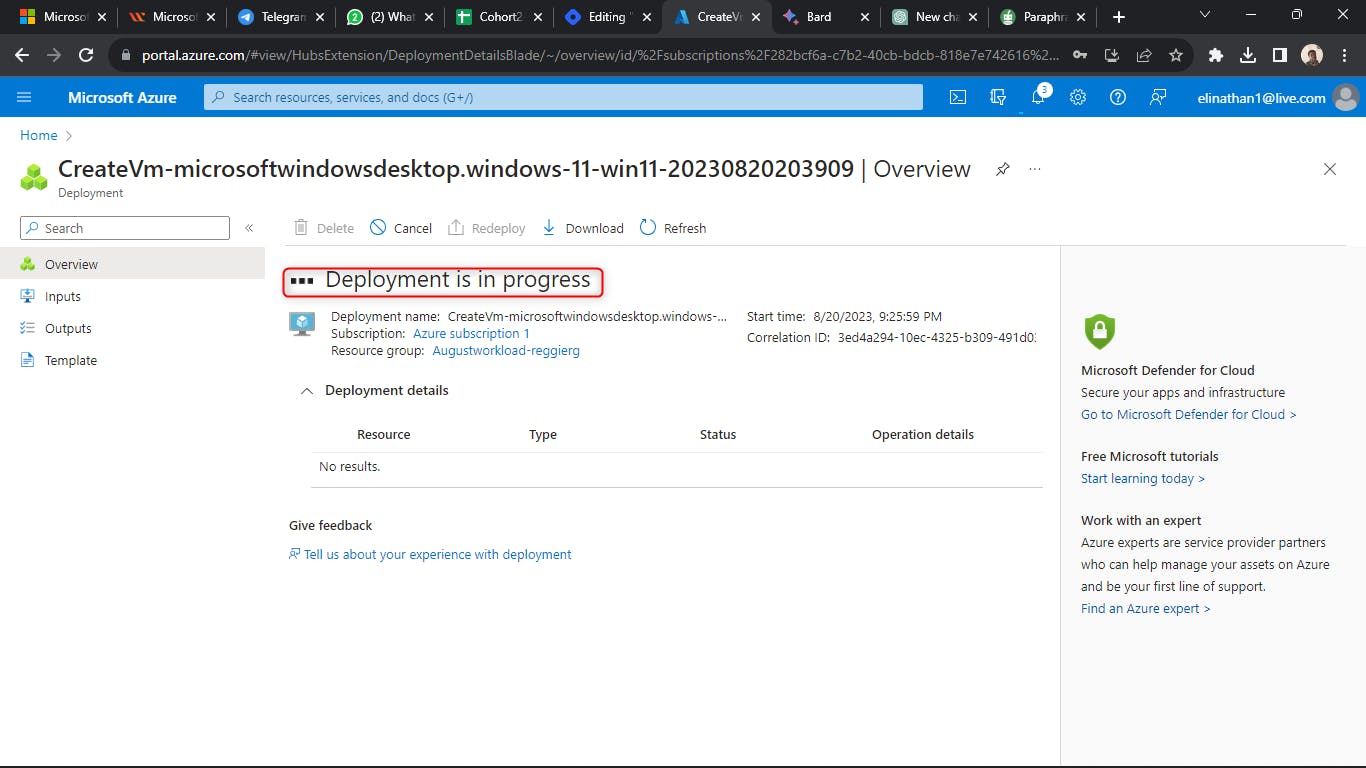
Now you click on the Create button as shown in the diagram as the installation starts

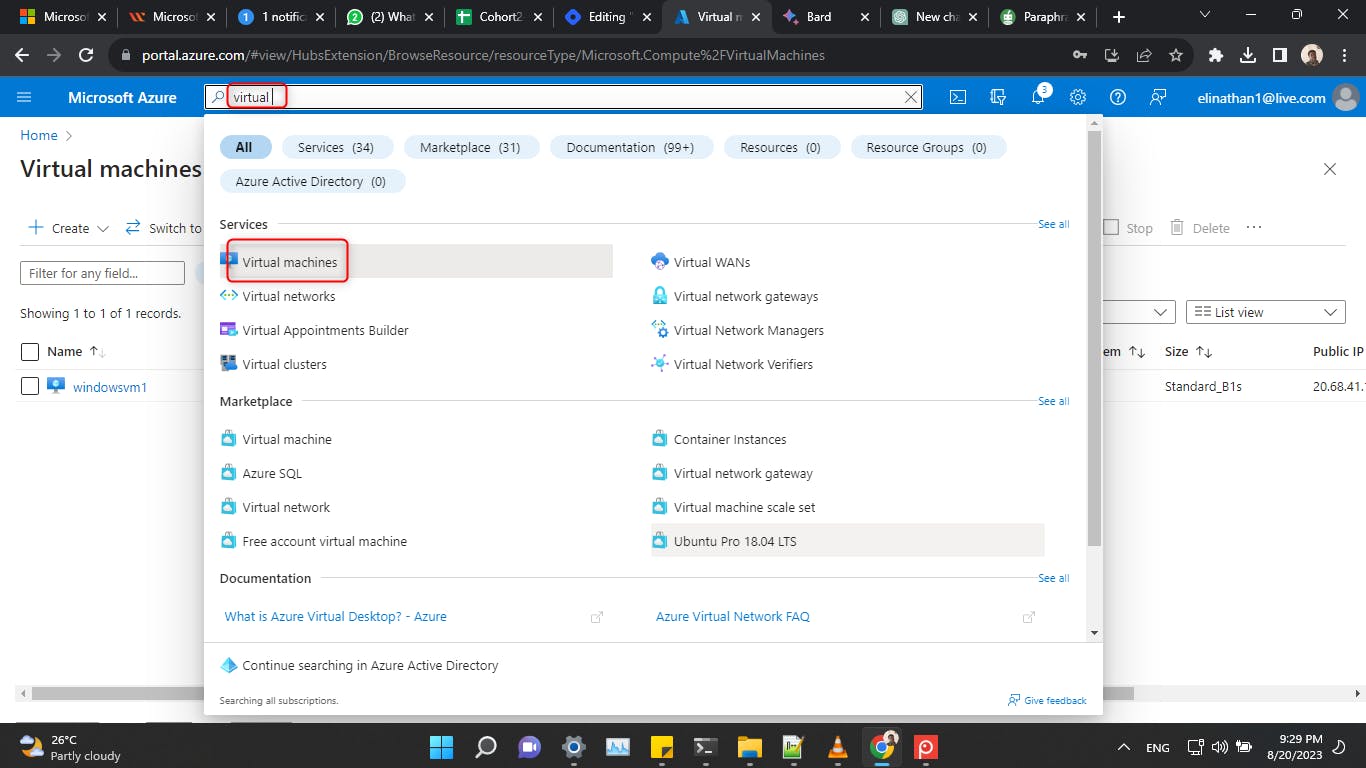

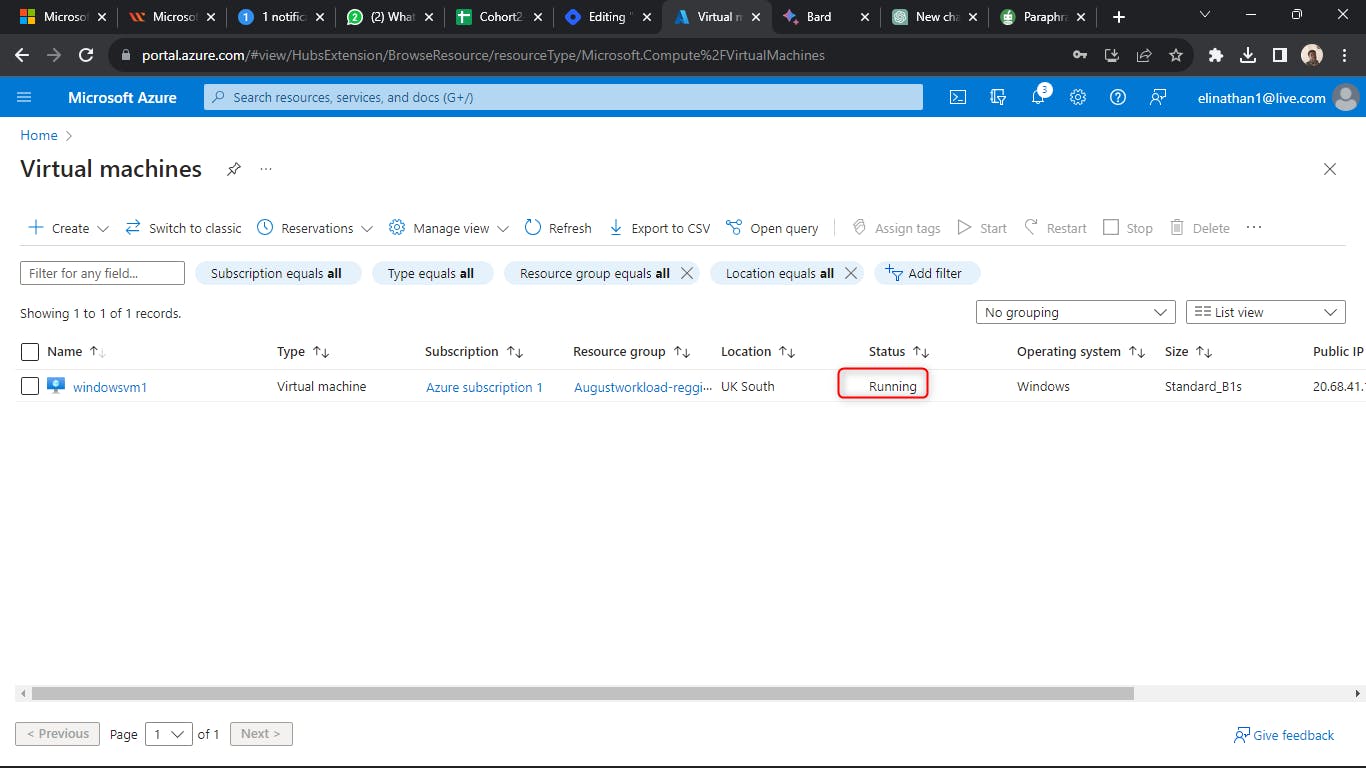

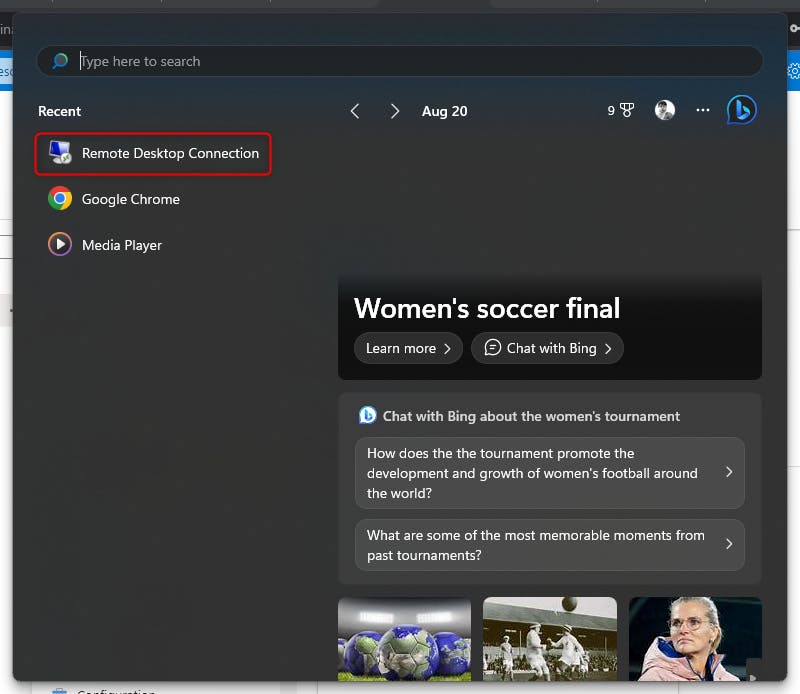
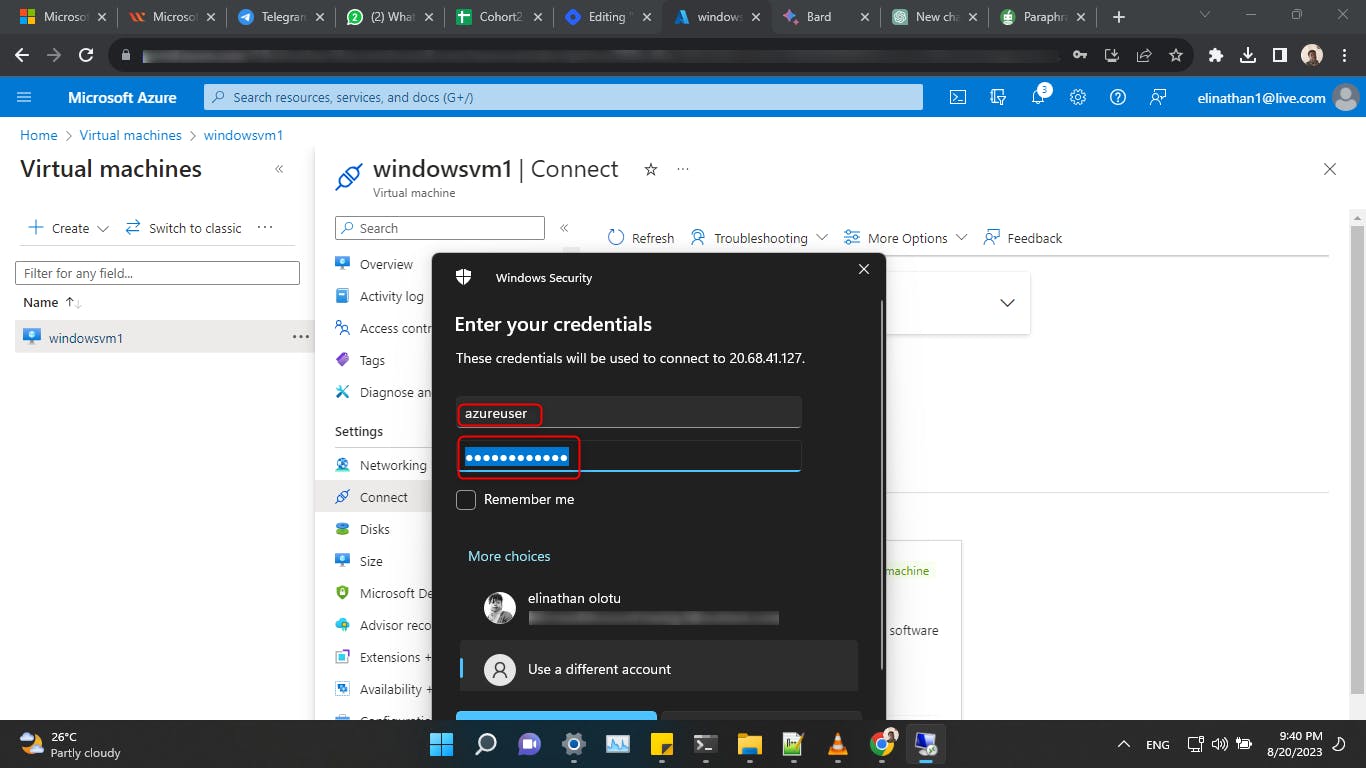
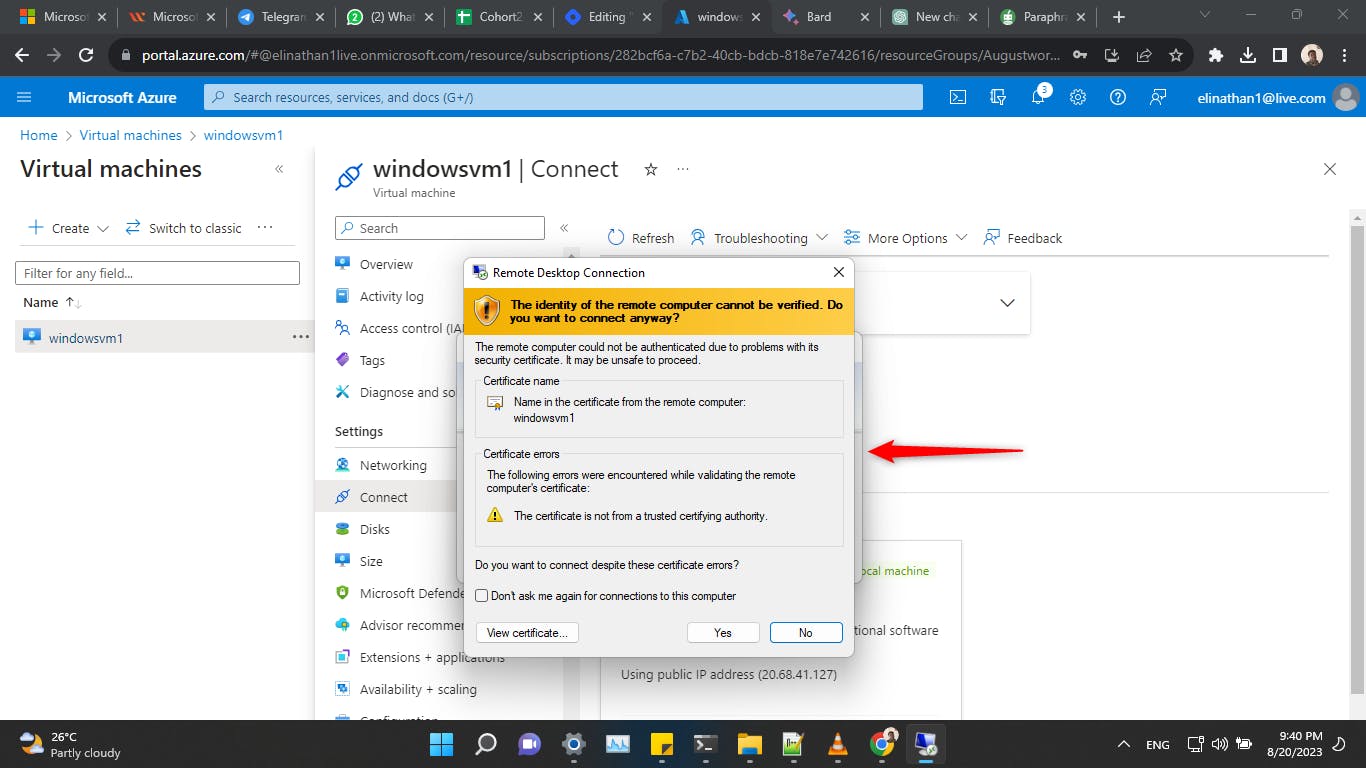
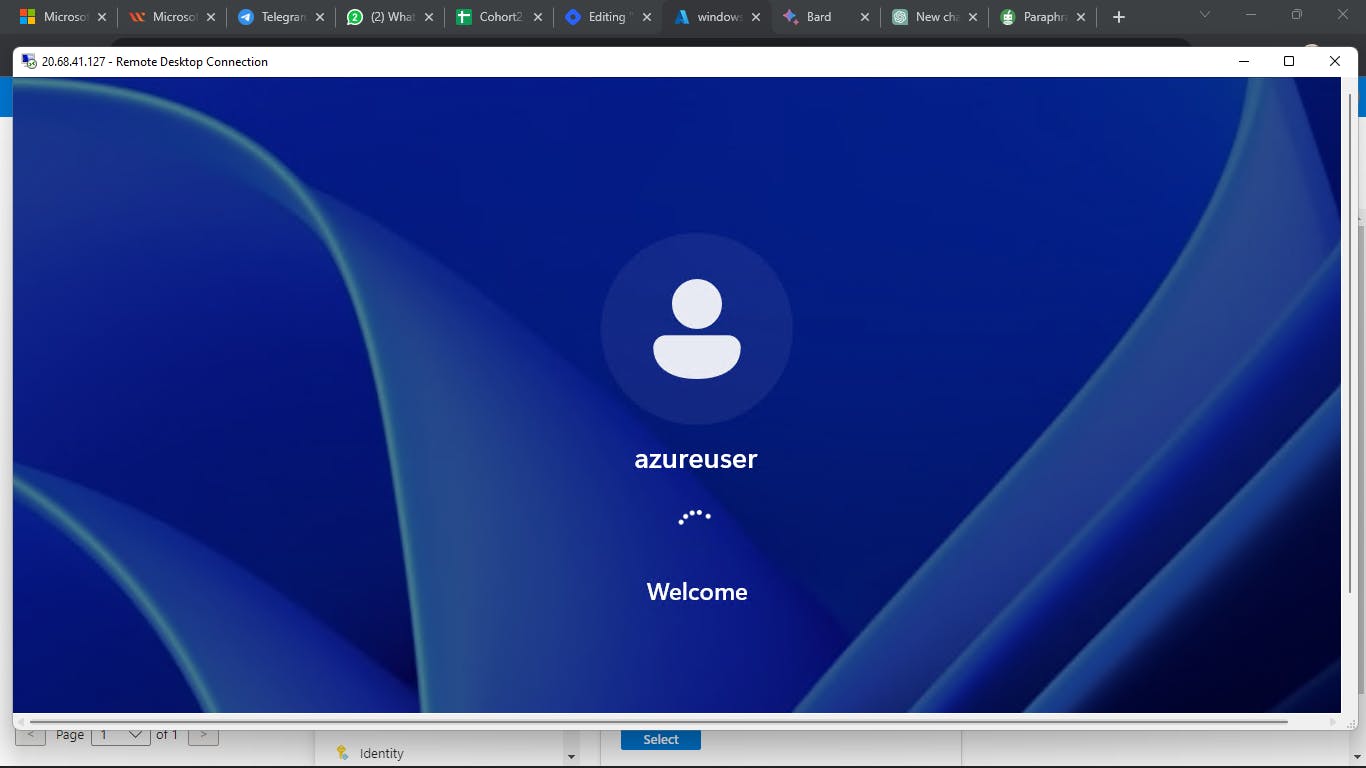

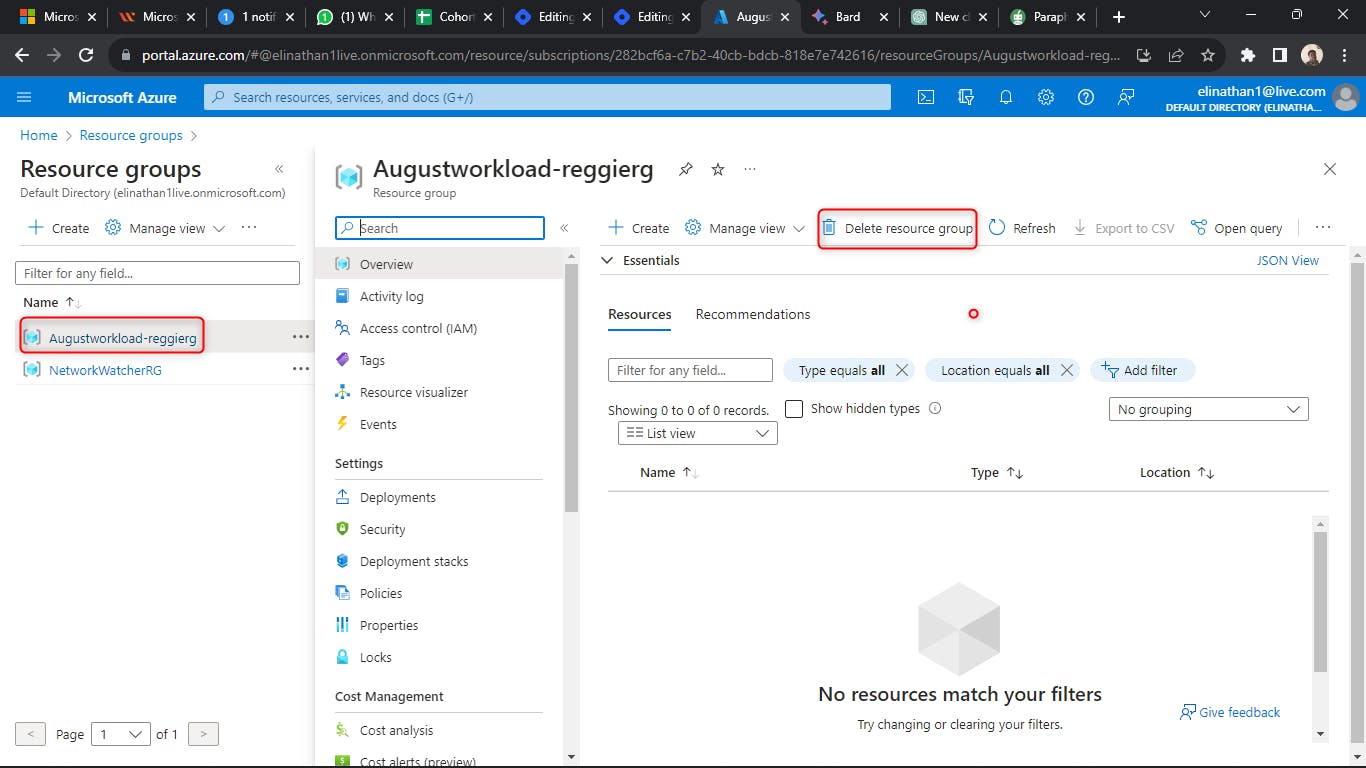
When you are done all you have to do is just delete the resource group to avoid incurring any hidden costs.
Please, if you find it helpful, kindly like and share
